In modern construction, efficiency depends not only on good designs but also on impeccable management. This is where BIM 2.0 comes in, connecting modeling in Revit with the flexibility of Odoo ERP. The goal: clearer projects, more accurate budgets and better control of the work.
Why integrate Revit with Odoo?
Traditionally, architecture and engineering teams work in Revit, while administration and finance are managed in an ERP. The two worlds are often disconnected, which causes errors that affect the time and output of the project.
With BIM 2.0 that gap narrows: model data becomes useful information for budgets, certifications and project control.
Learning step by step
Class 1: Export from Revit
The first step is to create material schedules in Revit and export them. This turns technical information into data ready for Odoo. The steps are:
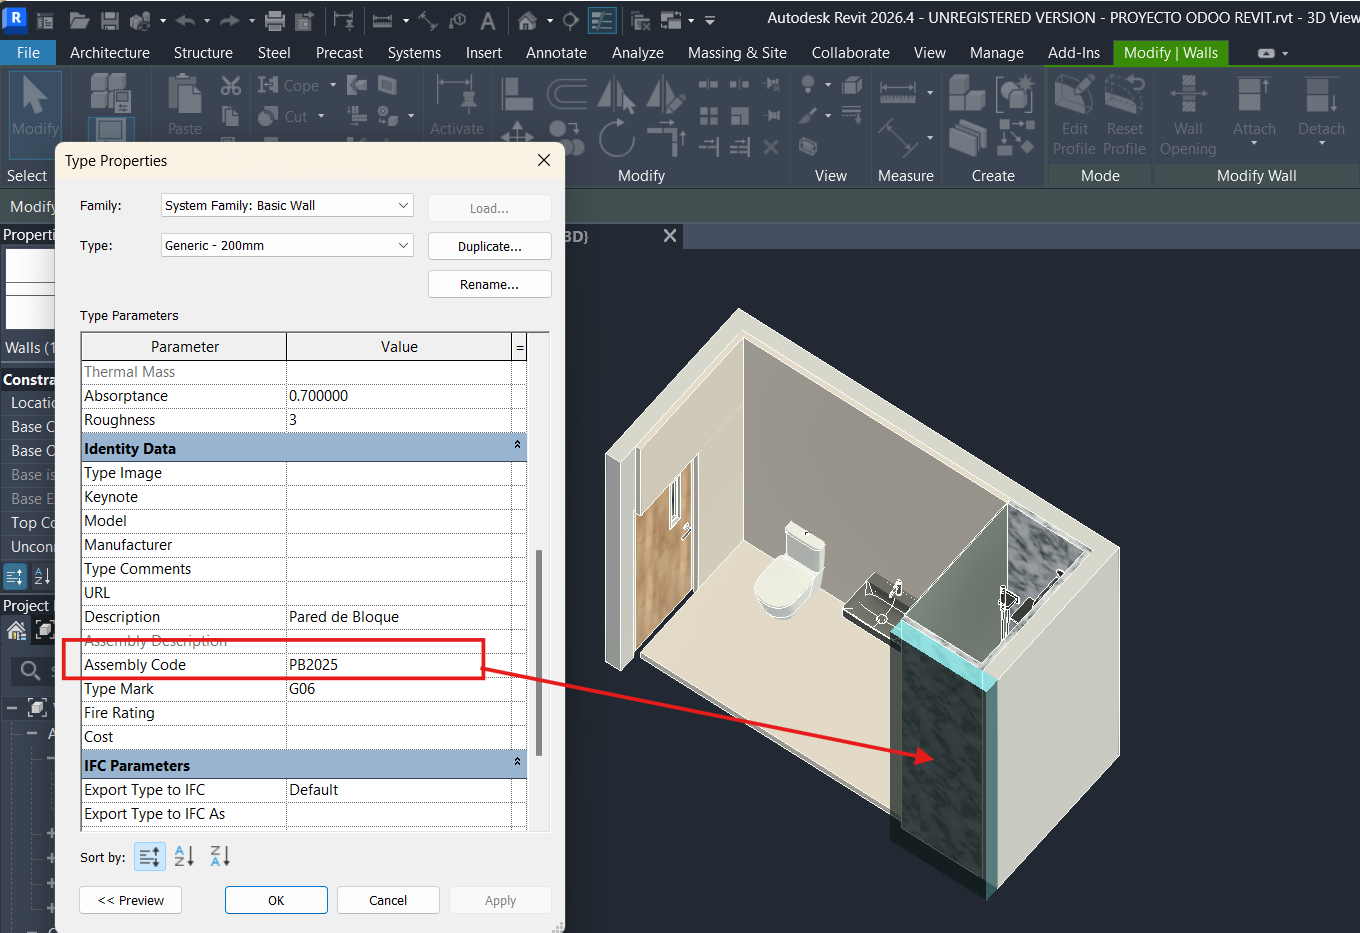
- Have the Revit model finished with all its elements. It is important that each element has its assembly code assigned in its properties.
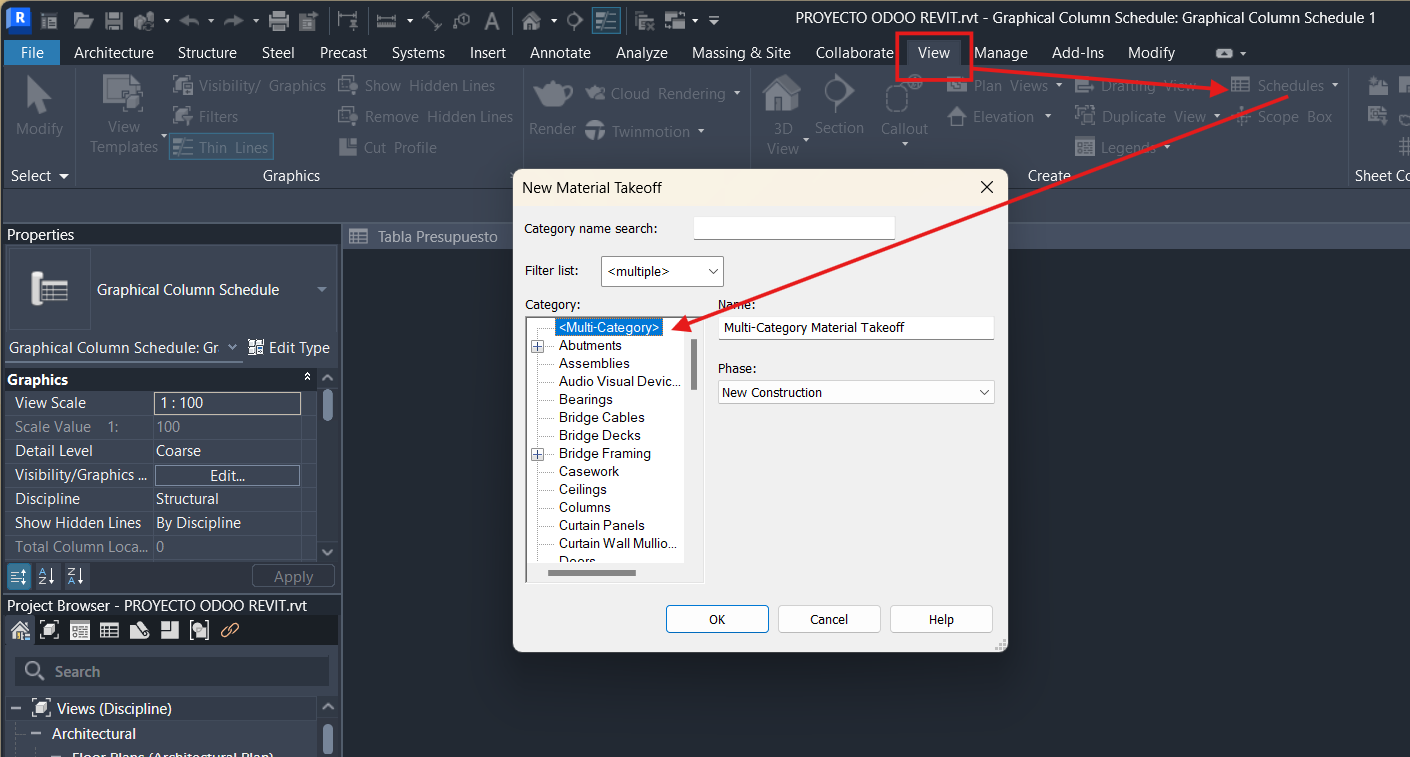
- Go to the View / Schedules / Material Takeoff tab and select the Multidiscipline option in the dialog box.
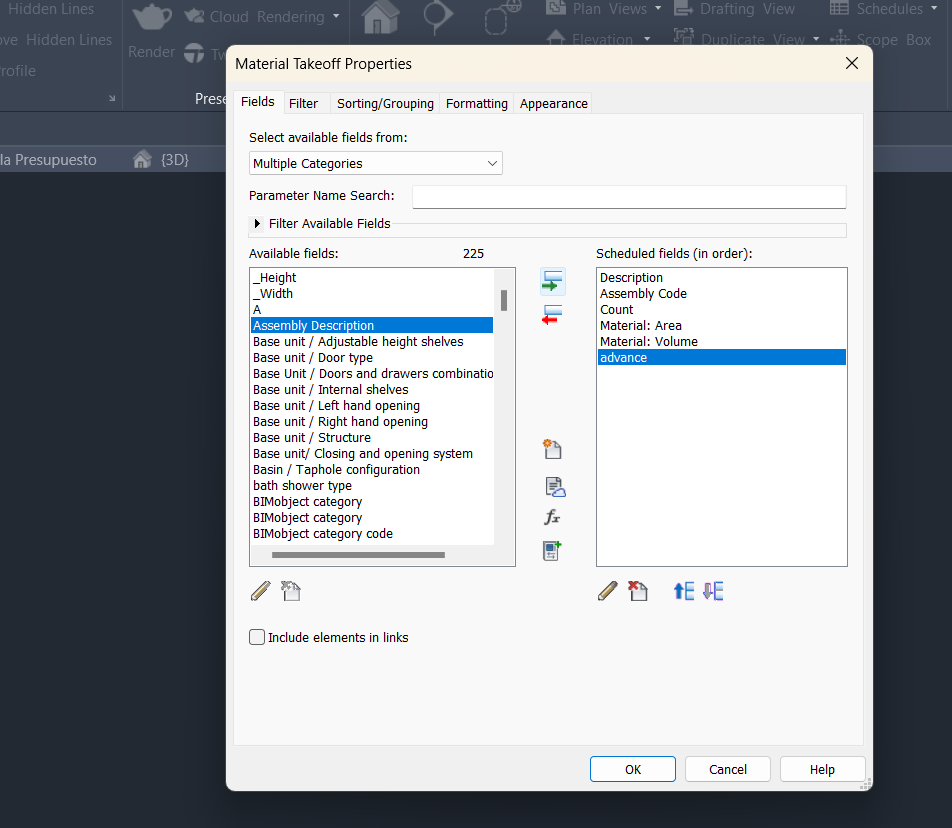
- Select the columns for the schedule. In this case: Description, Code, Quantity, Material: Area, Material: Volume and Progress.
- Once the schedule is created, go to Home / Export / Reports / Schedules.
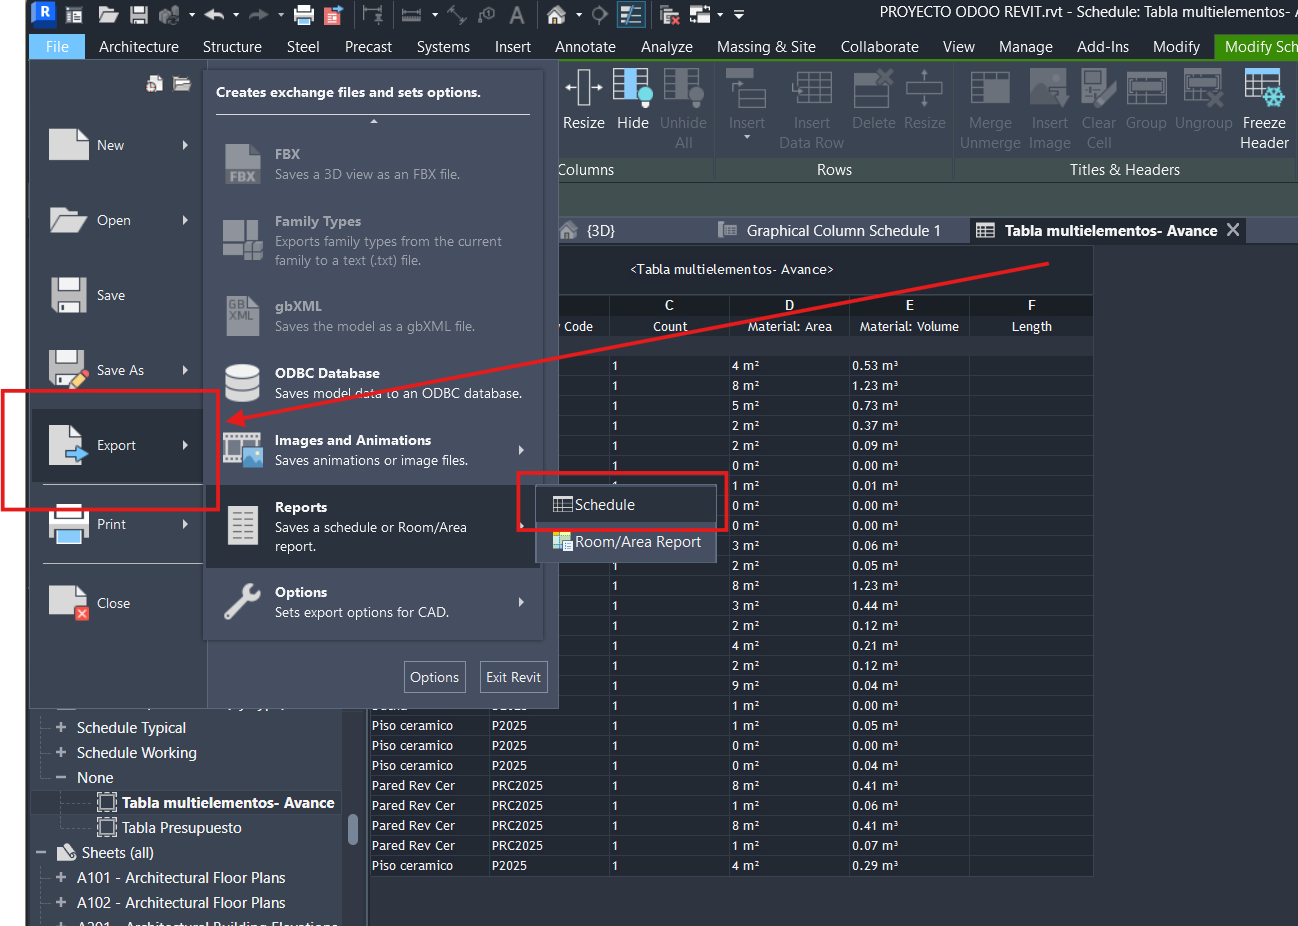
- Save the file in .TXT format. In the next dialog box, uncheck "export title", choose the comma as separator and use no text qualifier.
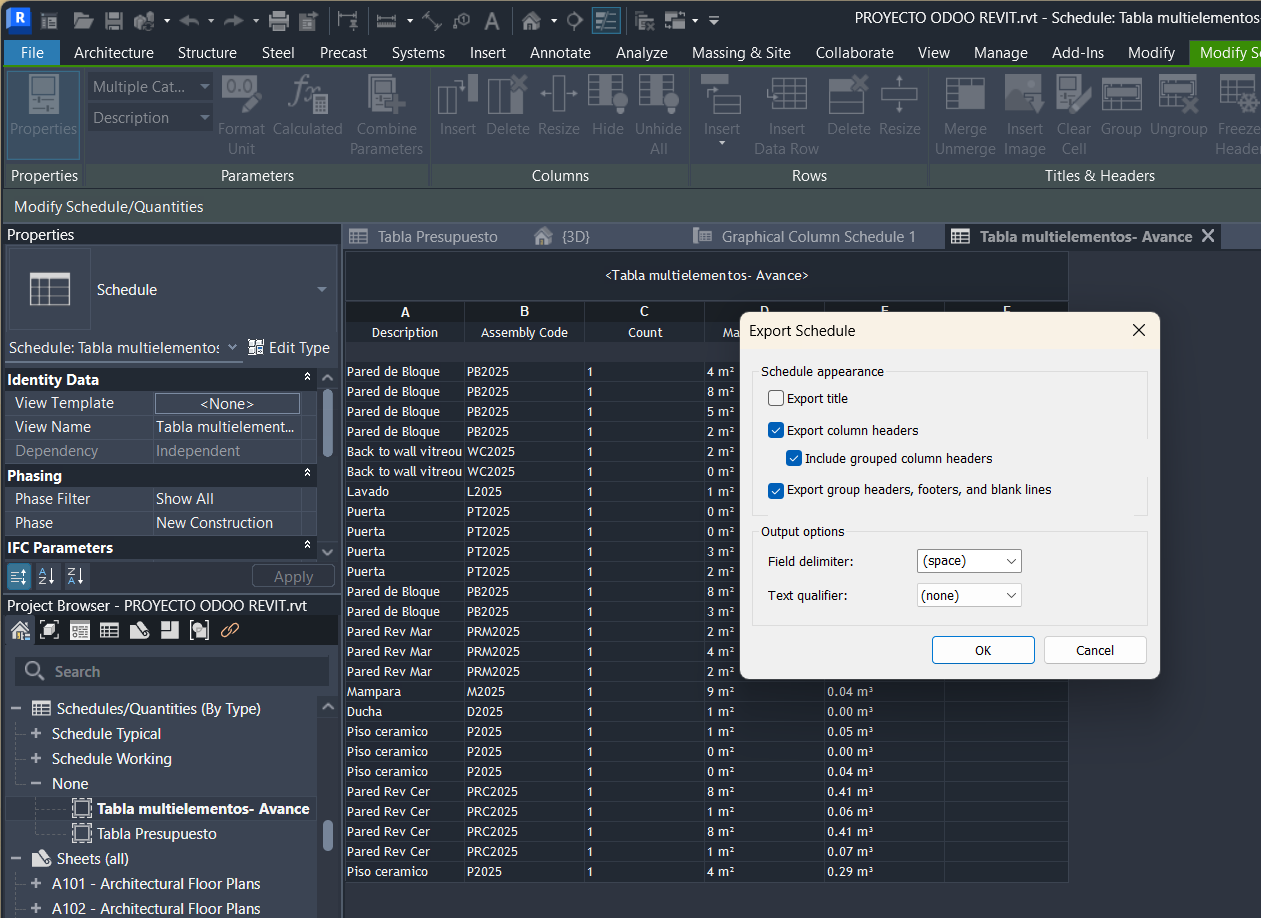
👉 Watch the video here.
Class 2: Set up unit price analyses (APU) in Odoo
Once the data is exported, it is time to set up the Unit Price Analyses (APU) in Odoo. This way each material and resource has its real value.
- In Odoo, go to the BIM module / Data / Unit price groups.
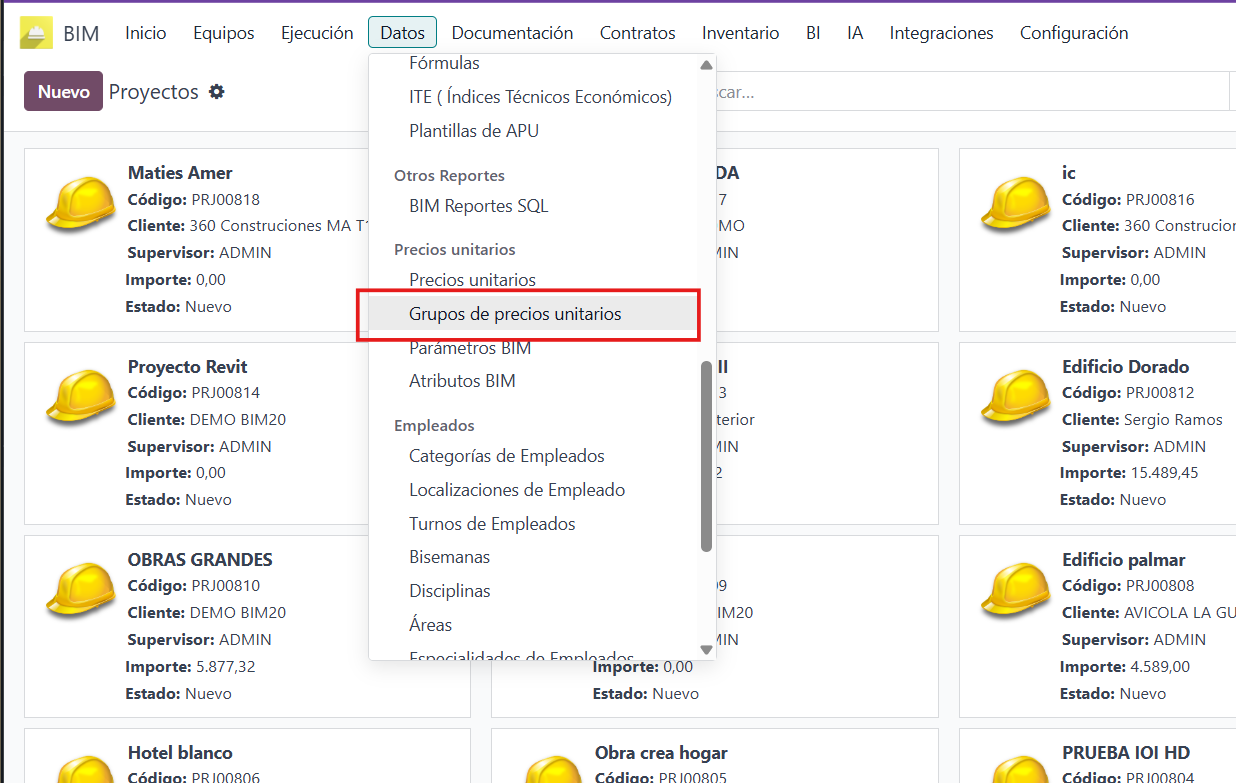
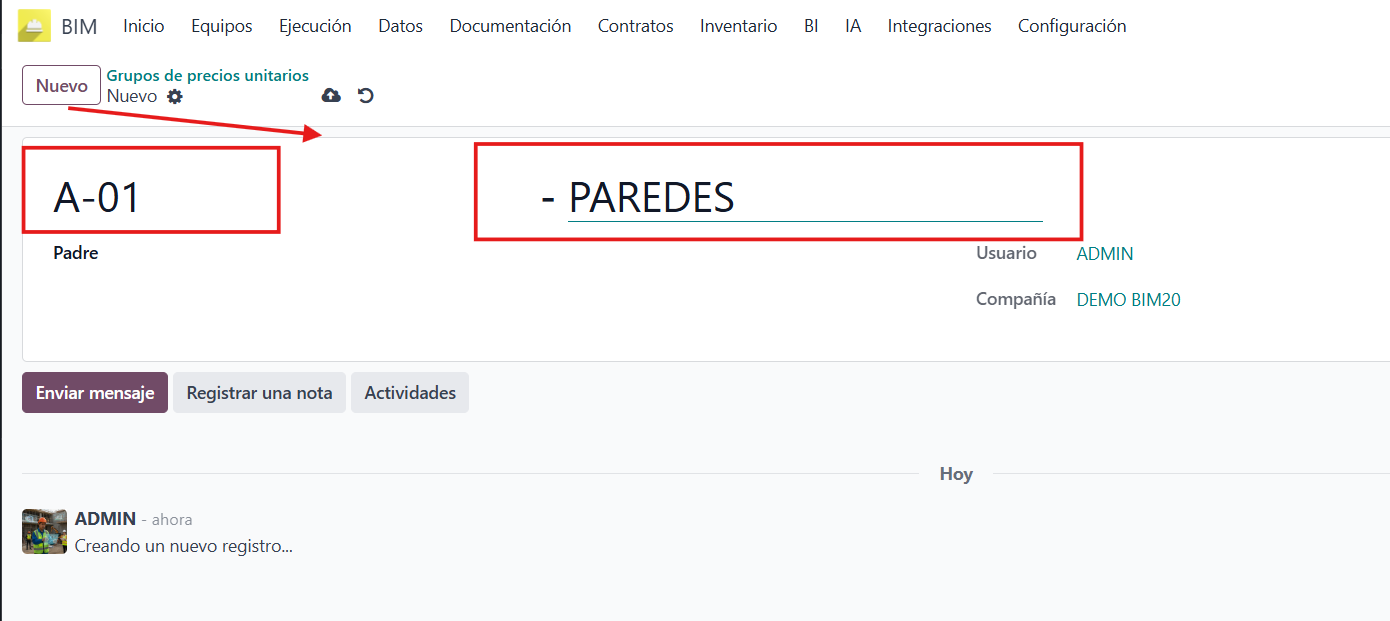
- Create a new group with a code and a name. It will be represented as a section in the budget; inside the group, link the unit prices that make it up.
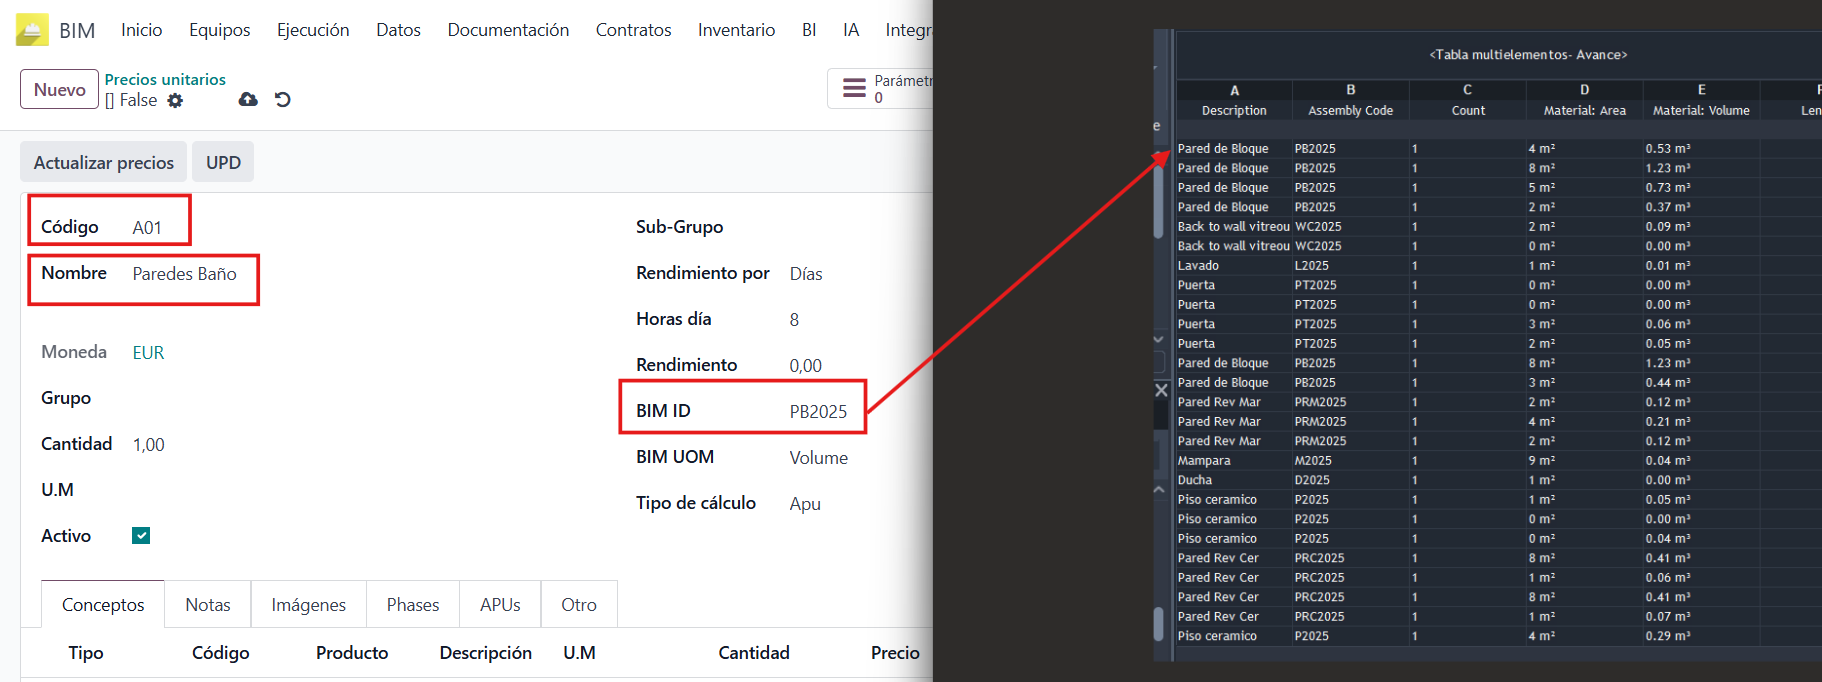
- In BIM / Data / Unit prices click New, assign a code and a name and, in the BIM ID field, enter the assembly code you assigned to each element in Revit. Every Revit element must have its unit price.
Class 3: Import budgets
With the schedule and the unit prices ready, complete budgets can be imported from Revit into Odoo. This way the model and financial management speak the same language.
- Create a project and, inside it, a budget.
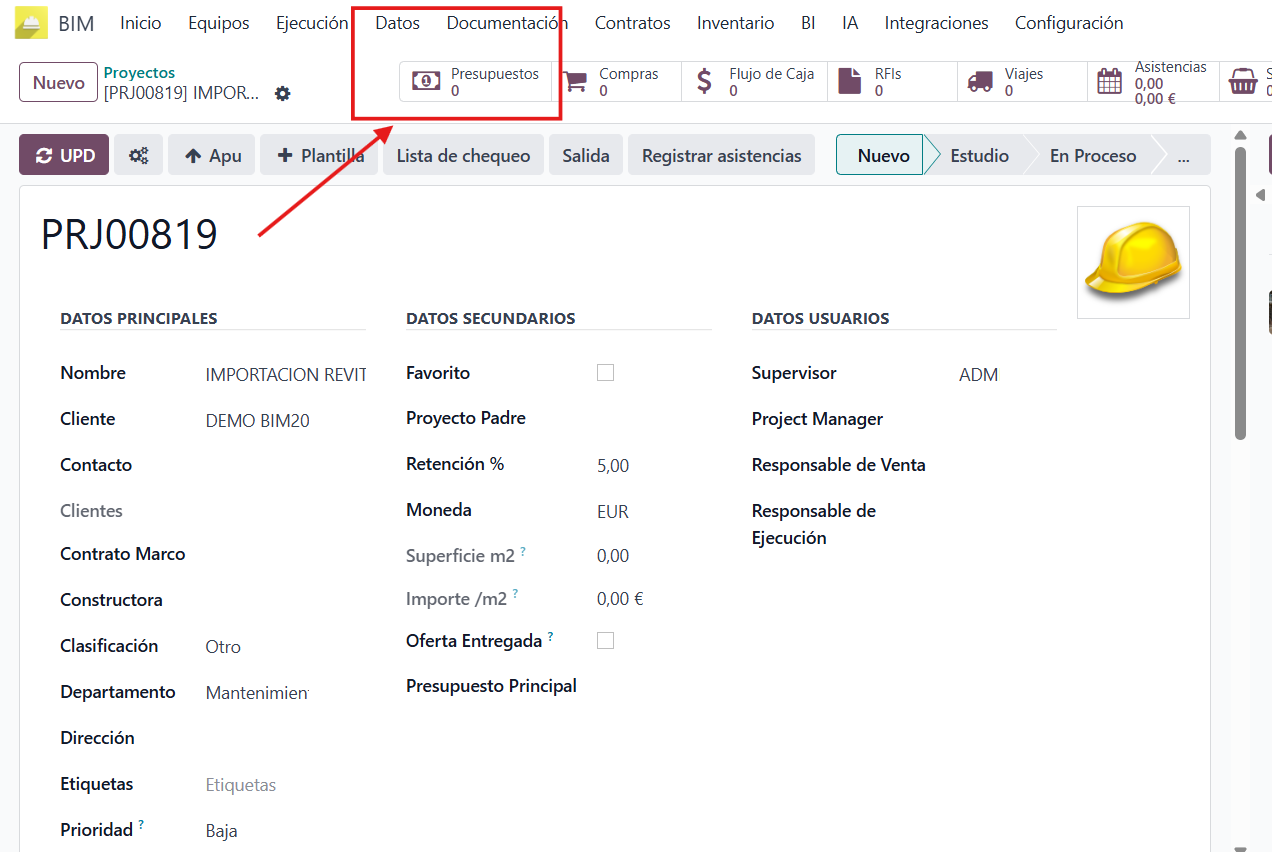
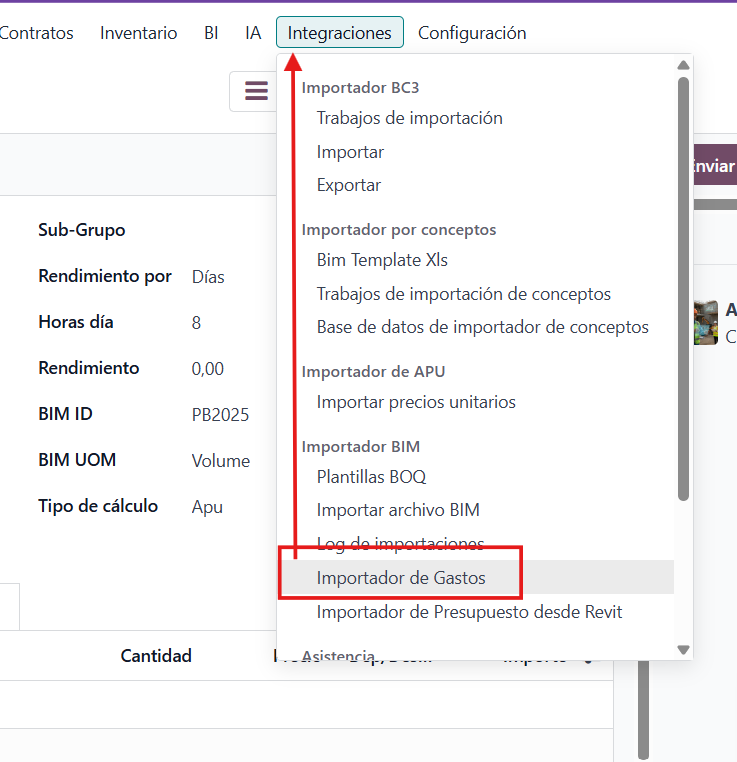
- Go to BIM / Integrations / BIM Importer / Budget importer from Revit.
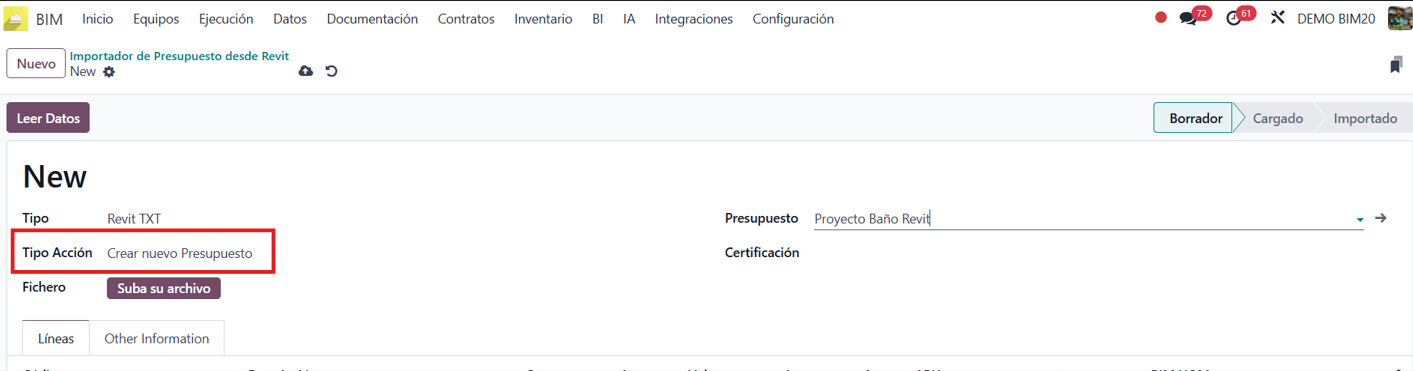
- Create a new record and, in the action type, select Create new budget.
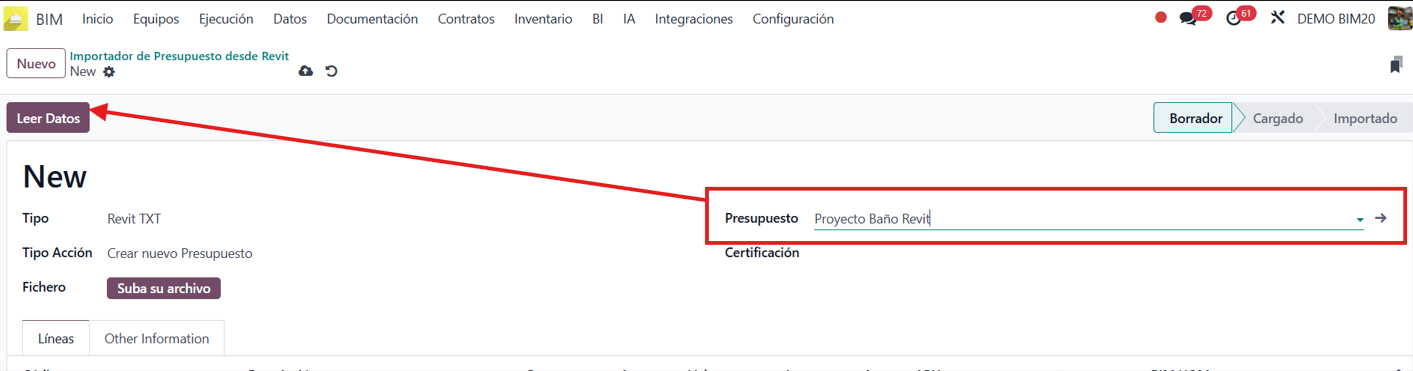
- Load the file exported from Revit and click Read data.
- Odoo generates the budget items, with their sections and line items, according to the groups and unit prices you created.
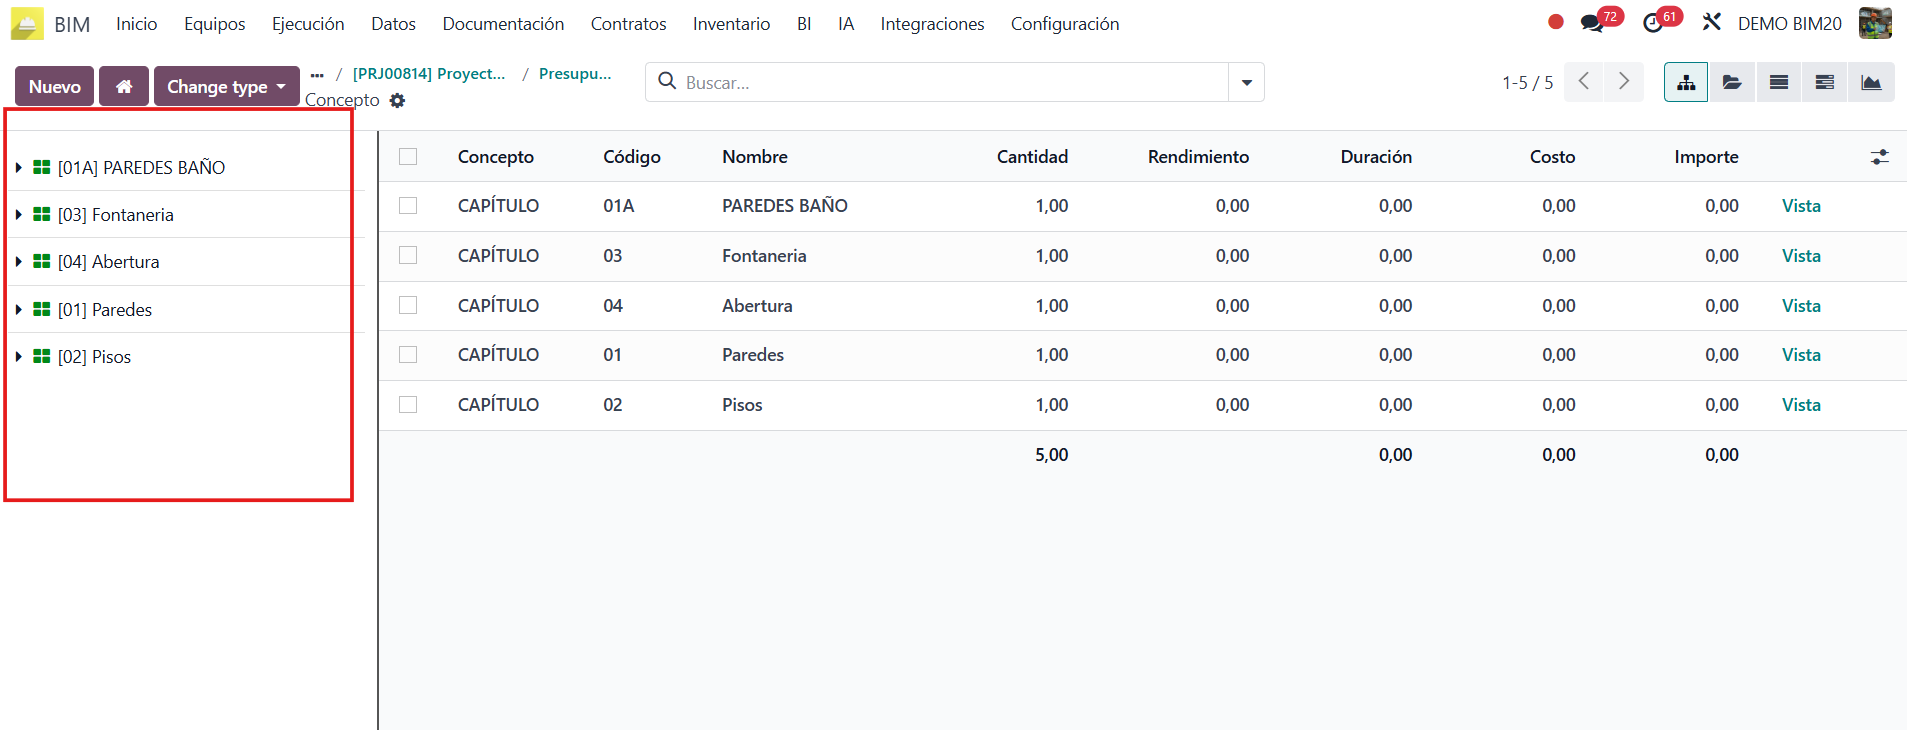
Class 4: Progress certifications
Finally, the integration lets you import certifications from Revit into Odoo, which makes it easier to track progress and payments.
- Create the project stages.
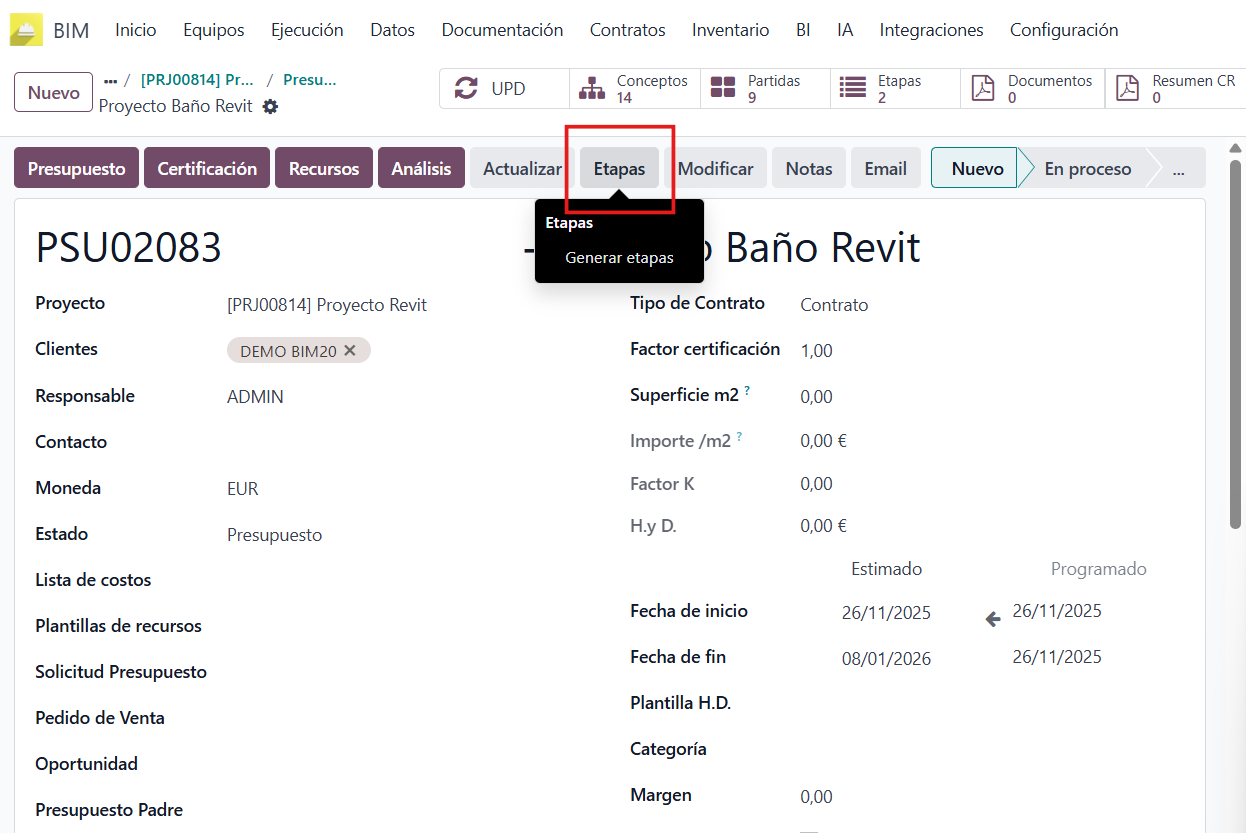
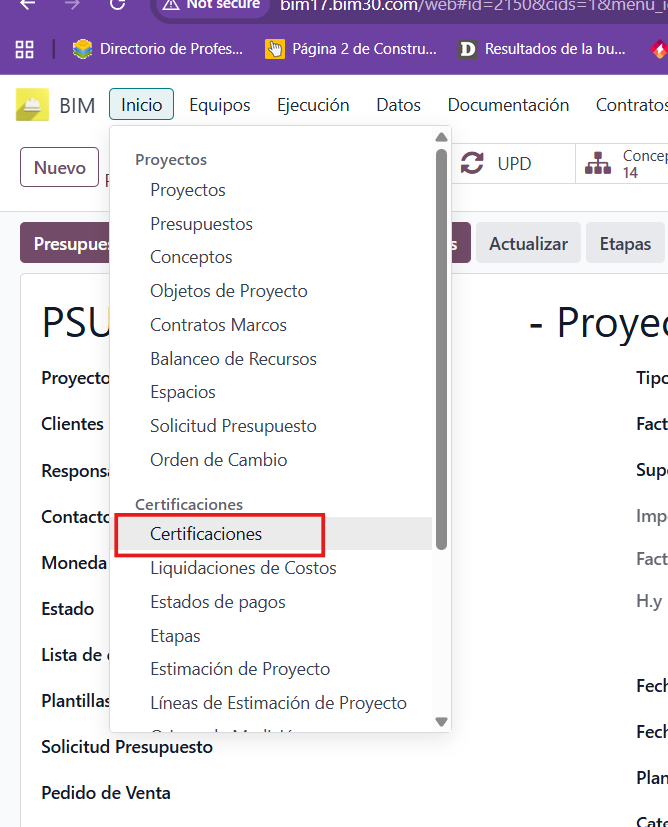
- Go to Home / Certifications and, with the project and budget selected, click Load. Save when Odoo assigns the sequence code.
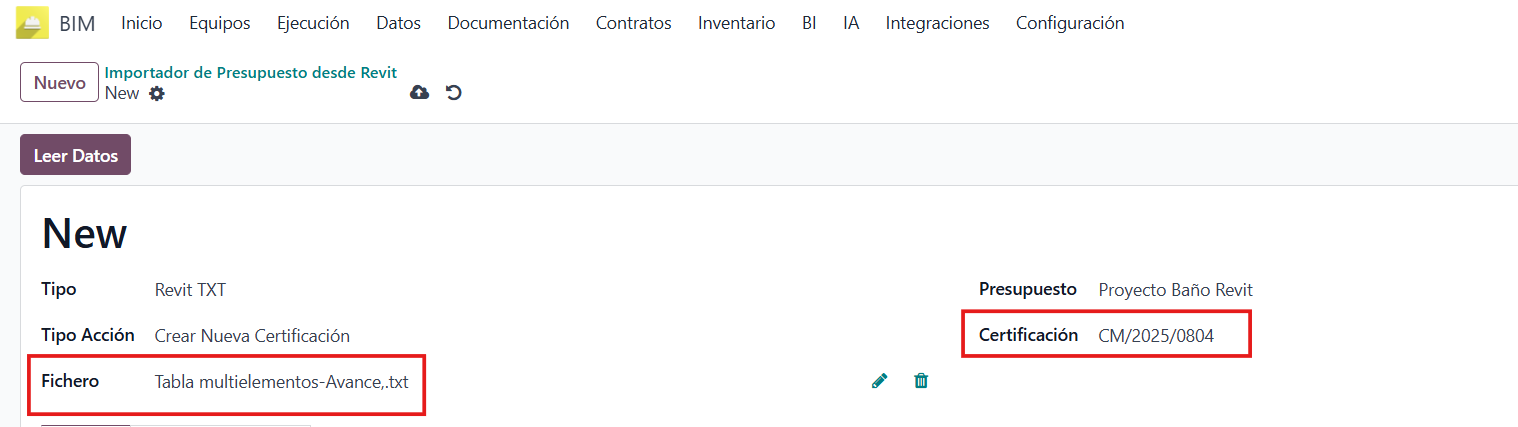
- Create a new record in the importer and, in the action type, select Create new certification.
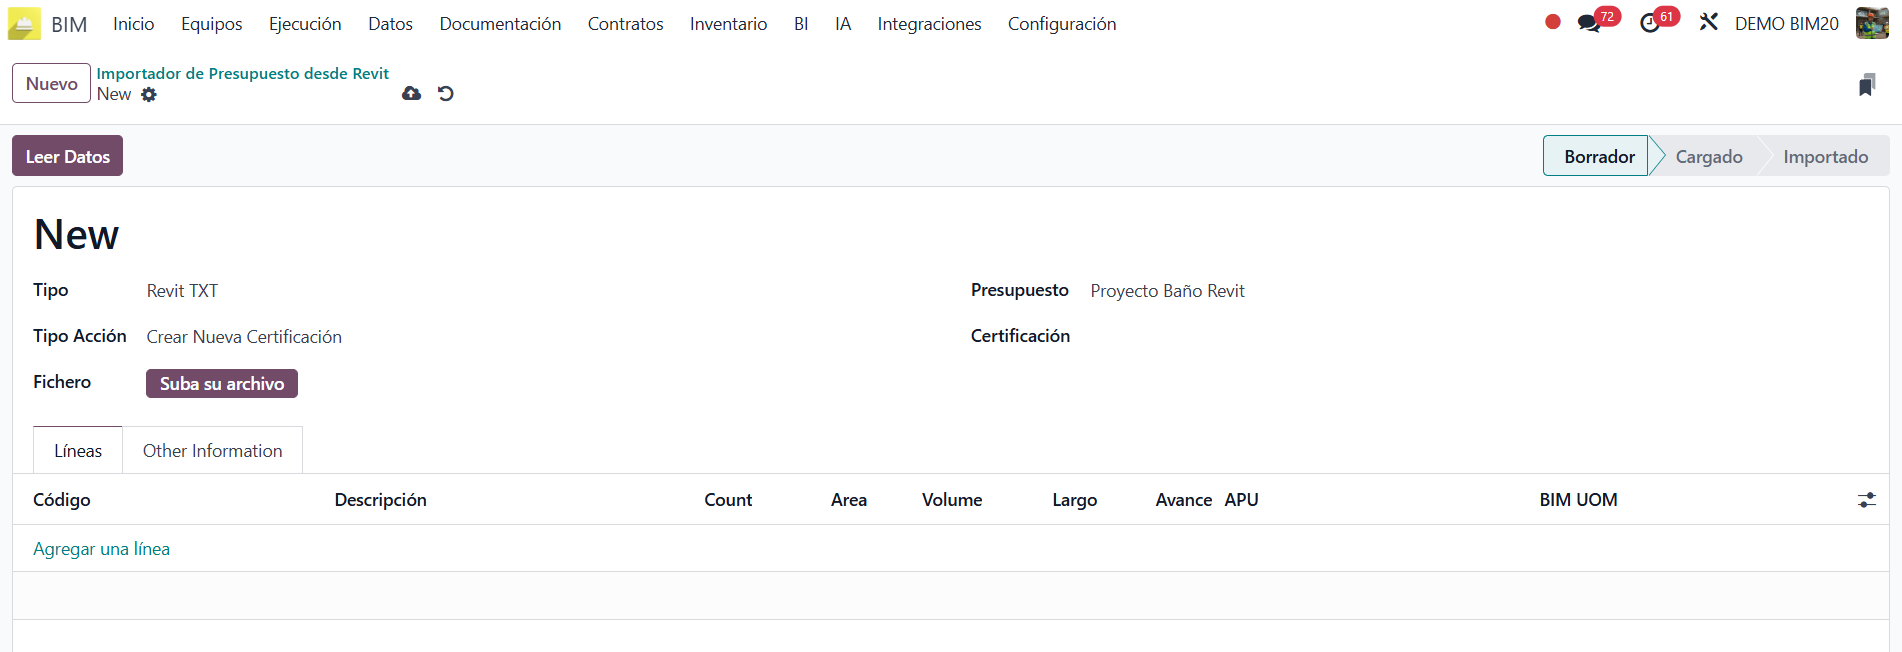
- Load the file exported from Revit, select in the Certification field the sequence created in step 2 and click Read data.
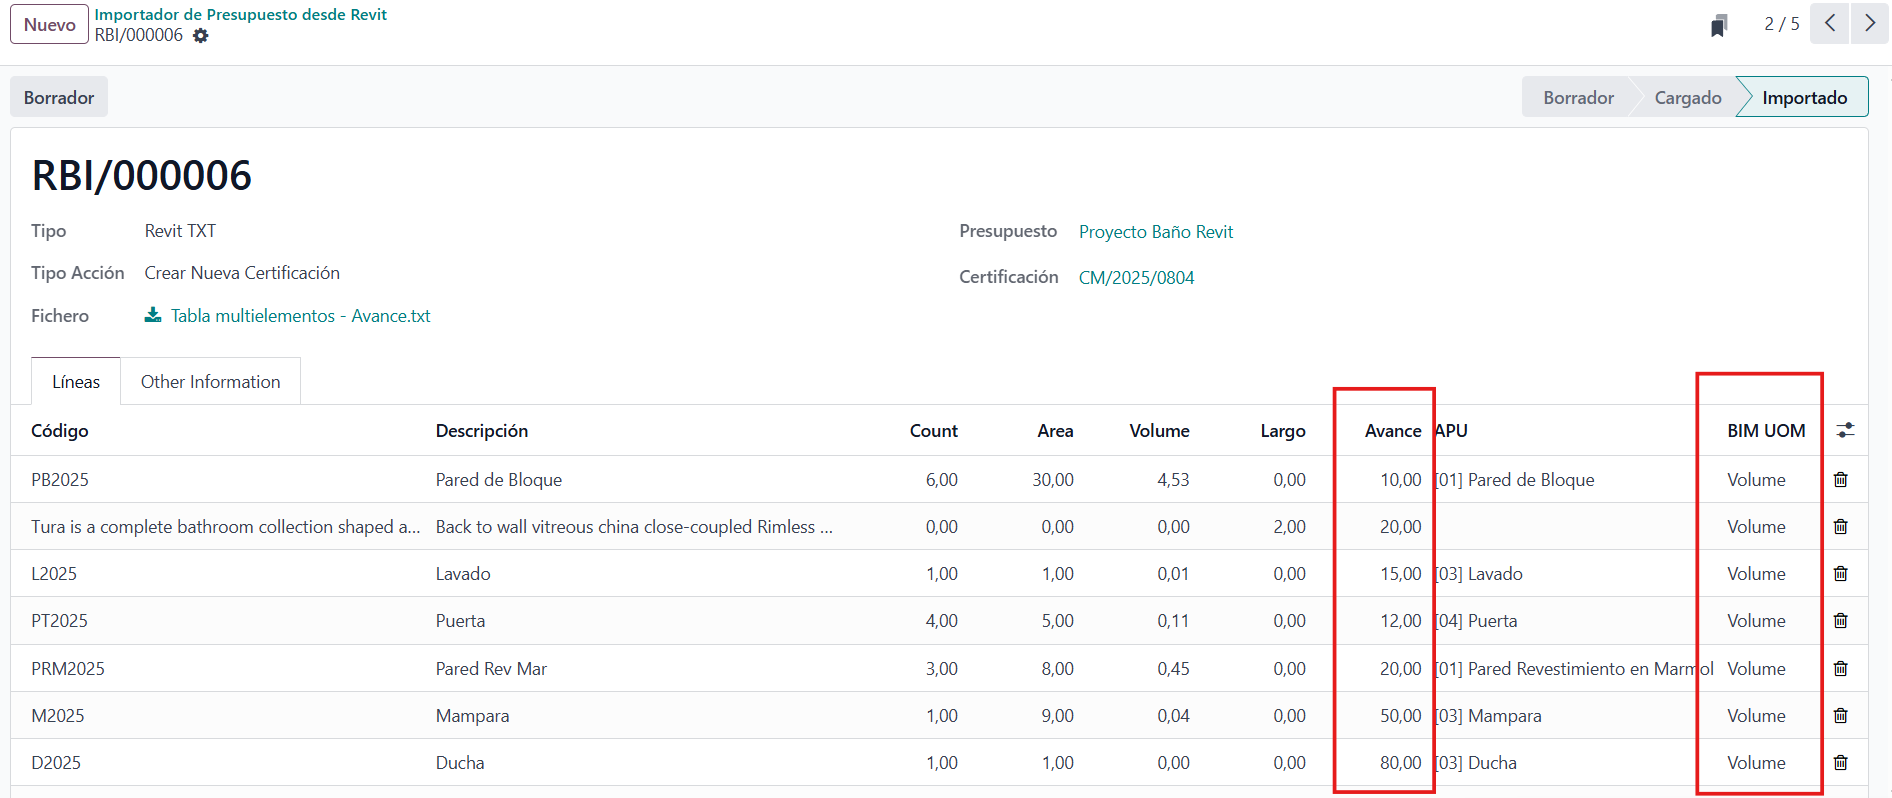
- In the lines you can load the elements with their progress percentages, or bring them in as data from the Revit file. Check that everything is correct; in the BIM UoM column you can change the unit that will be created for each line.
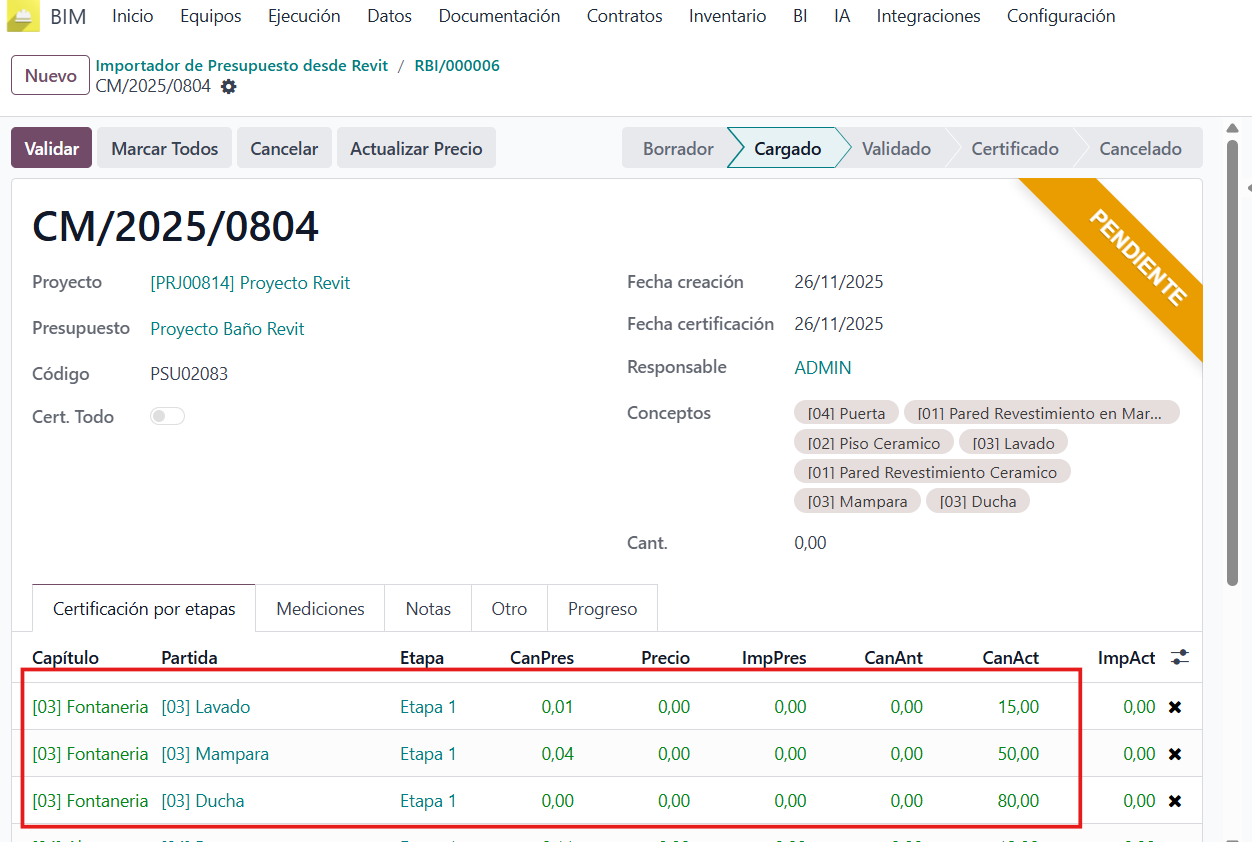
- Open the certification: you will see the line items loaded with their progress.
👉 Demo video.
To go deeper into how a certification is calculated, read how to prepare a progress certification step by step.
Beyond the technology
What is interesting about this integration is that it is not only about software: it is a change in the way of working. Architects, engineers and administrators can collaborate in a single workflow, reducing errors and gaining transparency.
Want to try it?
BIM 2.0 offers personalized demos for teams that want to take the leap. Direct contact via WhatsApp or through the contact form.
Conclusion
The combination of Revit and Odoo ERP with BIM 2.0 is a more integrated and efficient way of thinking about construction, with the budget, the certifications and the model speaking the same language.