Where Invoicing › Vendors › Invoice Delivery Notes › Incoming Delivery Notes
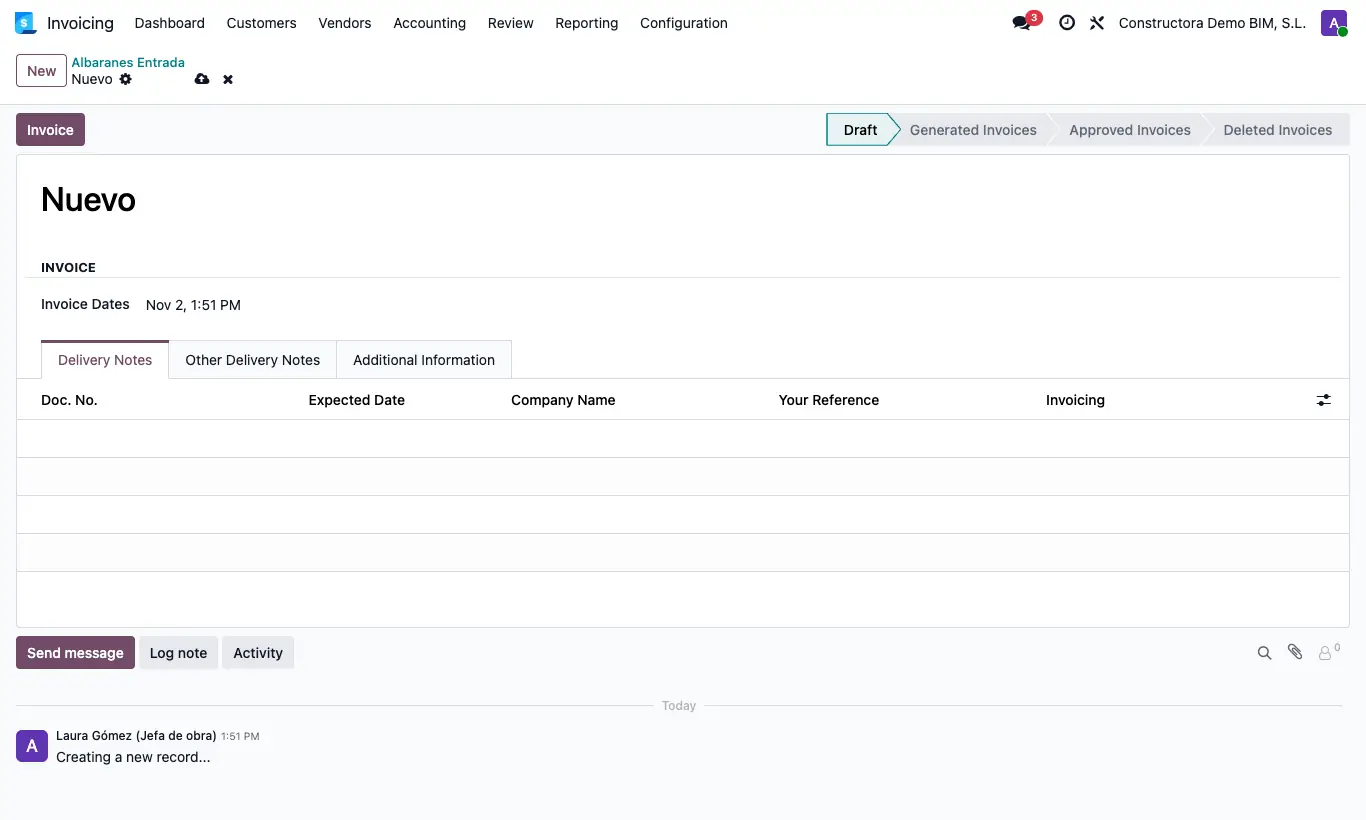
Steps
- In the Inventory delivery notes list, select the validated delivery notes you want to invoice.
- In Actions choose Invoice Delivery Notes, leave the Type as Purchase (or Sale for customer delivery notes) and click Confirm.
- A record opens with the Delivery Notes tab: check each delivery note, its Company Name and its Invoicing (To Invoice). If you want, adjust the Invoice Dates.
- Click Invoice: a draft invoice is created per contact, with one section per delivery note and its lines at the delivery note's Cost. The returns in the selection generate a credit note.
- Check the invoices in Incoming Invoices (or Outgoing Invoices) and click Post Invoices. The record changes to Approved Invoices.
Only validated delivery notes can be invoiced: "The delivery note … is not validated".
If any is already Invoiced, "There are delivery notes that are already invoiced, please search again" appears. Remove it and start again.
The invoices do not carry the project or the analytic account: if they are project expenses, complete them before posting.
The records are kept in Invoicing › Vendors › Invoice Delivery Notes › Incoming Delivery Notes and in Invoicing › Customers › Invoice Delivery Notes › Outgoing Delivery Notes.
Each delivery note shows its state in Invoicing: To Invoice or Invoiced.
Before posting, Back to Draft deletes the generated invoices and leaves the delivery notes To Invoice again.
In the Other Delivery Notes tab you can add more delivery notes to an invoice already generated with Add Delivery Note (and remove them with Delete Delivery Note).